An inspection checklist only protects you if each item has a photo attached at the moment you...
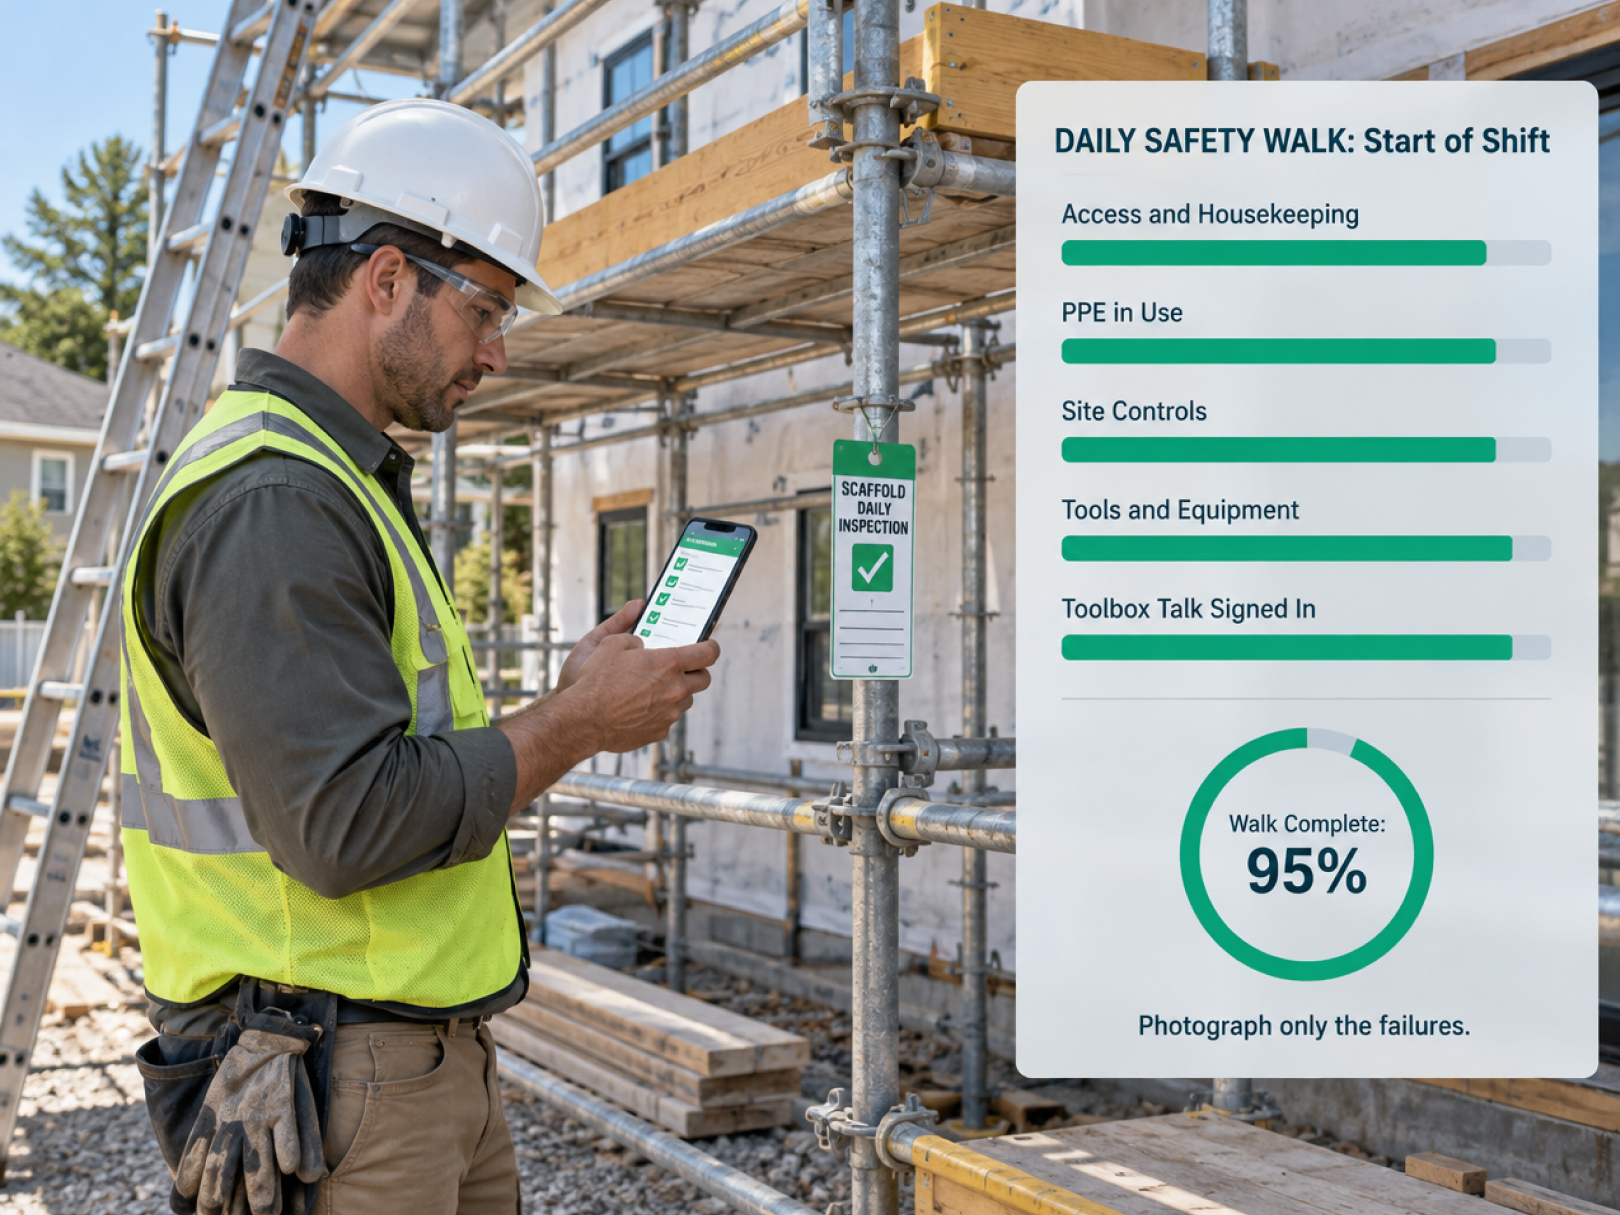 A safety checklist only protects anyone if it is done before the hazard, not filed after the incident. The most useful safety records are short, daily, and specific: a 10-minute toolbox talk with a sign-in, a ladder check before the first climb, and a photo of the fall protection anchor before the crew goes up. The least useful are the binders completed in bulk on Friday afternoon.
A construction photo app with checklists turns those routines into a workflow a foreman can finish on a phone while standing at the hazard. This guide gives you copy-ready safety checklists for toolbox talks, daily site walks, ladders, fall protection, scaffolds, excavations, and electrical, plus a way to record failures with photos and track them to correction. It follows the same pattern as the quality templates in the field inspection workflow.
These checklists are starting points. They do not replace your written safety program, a competent person where the rules require one, OSHA standards, state plan requirements, or advice from a qualified safety professional. Verify every item against the current rules that apply to your work.
Why Digital Safety Checklists Beat Paper
Paper safety forms fail in predictable ways: they get filled out late, they get lost, and nobody can search them.
Digital checklists fix five problems:
- Timing. Each entry carries a timestamp and location, so you can show the check happened before work started.
- Evidence. A photo attached to a failed item shows the hazard and, later, the correction.
- Accountability. Each item records who answered it and from where.
- Follow-up. A failed item becomes an assigned task with a due date and a re-check.
- Records. Reports, trends, and sign-ins are searchable years later.
Records also matter after an incident or inspection. Contemporaneous, location-stamped checks show a pattern of diligence, though they do not substitute for actually fixing hazards. See construction defect claims for how documentation supports your position when disputes arise.
Where Most Construction Injuries Come From
A handful of hazard categories account for a large share of serious construction injuries and fatalities, so build your checklists around them.
OSHA often groups the leading causes as the "Fatal Four": falls, struck-by incidents, electrocution, and caught-in or caught-between incidents. Falls are consistently the leading cause of construction deaths. That is why the templates below weight fall protection, ladders, scaffolds, and excavations heavily, and why electrical and struck-by hazards get their own checks.
Use your own incident and near-miss history to adjust. A roofing company needs heavier fall protection and ladder coverage. A site-work company needs more on excavations, equipment, and traffic. For roofing-specific operations, see the roofing project manager role guide.
How to Run the Checklists
Keep each checklist short enough to finish in a few minutes, and require a photo only where it adds value.
For each line item, record:
- Result: Pass, Fail, or N/A
- Photo: required on every Fail and optional on Pass
- Notes: measurement or condition, where relevant
- Inspector: name and role, captured by the app
- Corrective action: what will be done, by whom, and by when
- Re-check: a second photo from the same angle after correction
Stop-work rule: If a hazard poses imminent danger, work stops in that area until it is corrected. Write that into your safety program, and make sure every foreman knows they have the authority to stop work.
Roles matter. Some inspections must be done by a competent person, defined in OSHA standards as someone capable of identifying hazards and authorized to take prompt corrective action. Excavations and scaffolds are common examples. Make sure the named inspector qualifies.
Template 1: Toolbox Talk
A toolbox talk is a short, focused safety briefing at the start of a shift. Record the topic, attendees, and any issues raised.
Copy-ready toolbox talk record
Project: [Name] | Date: [] | Time: [] | Led by: [Name]
Topic: [e.g., ladder safety, heat illness, trenching, lockout, silica dust]
Key points covered: [3 to 5 bullets]
Site-specific hazards today: [Overhead work, crane picks, deliveries, wet surfaces, other trades above or below]
Questions or concerns raised: [Notes]
Actions assigned: [Item, person, due]Attendance: [Name, company, signature or app sign-in]
Topic ideas by season and work type
- Heat illness: water, rest, shade, and signs of trouble
- Cold stress and slippery surfaces
- Ladder setup and three points of contact
- Fall protection anchors, harness inspection, and rescue plan
- Excavation hazards and egress
- Electrical safety, GFCIs, and overhead lines
- Silica dust and respirators where cutting masonry or concrete
- Struck-by hazards around equipment and loads
- Housekeeping and trip hazards
- Hand and power tool safety
- Reporting near misses without blame
Tips
- Keep it under 10 minutes
- Tie the topic to work happening that day
- Ask a question instead of lecturing
- Use an interpreter or translated materials where needed, so everyone understands
- Record attendance in the app so it ties to the same timestamp and location as the crew's clock-in
When crew clock-ins and toolbox talk sign-ins sit in the same system, you can confirm that everyone on site that day was briefed. See GPS time tracking for verified crew presence by project.
Template 2: Daily Site Safety Walk
A 10-minute walk at the start of the day, by the foreman or superintendent, catches most everyday hazards.
Access and housekeeping
- [ ] Walkways, stairs, and egress paths clear of debris and materials
- [ ] Trip hazards, cords, and hoses controlled
- [ ] Materials stacked and secured against tipping
- [ ] Nails, scrap, and sharp objects removed or protected
- [ ] Waste containers not overfilled
- [ ] Adequate lighting in work areas and stairs
People and PPE
- [ ] Hard hats, eye protection, gloves, and footwear in use
- [ ] High-visibility clothing in use where required
- [ ] Hearing protection in use near loud work
- [ ] Respirators and dust controls in place for cutting, grinding, and demolition
- [ ] Workers briefed on today's hazards
- [ ] Drinking water, shade, and rest available in hot conditions
Site controls
- [ ] Perimeter fencing, barricades, and signs in place
- [ ] Overhead hazards identified and protected, with falling object barricades below
- [ ] Open holes, floor openings, and edges guarded or covered and labeled
- [ ] Traffic control and spotters in place near equipment and deliveries
- [ ] Emergency contact numbers and nearest medical facility posted
- [ ] First aid kit stocked and accessible
- [ ] Fire extinguishers accessible and inspected
- [ ] Emergency action plan reviewed
Tools and equipment
- [ ] Power tools in good condition, with guards in place
- [ ] Extension cords undamaged and used with GFCI protection where required
- [ ] Equipment operators qualified and equipment inspected before use
- [ ] Backup alarms and lights working
Photograph and log only failures, so the daily walk stays quick.
Template 3: Ladder Inspection
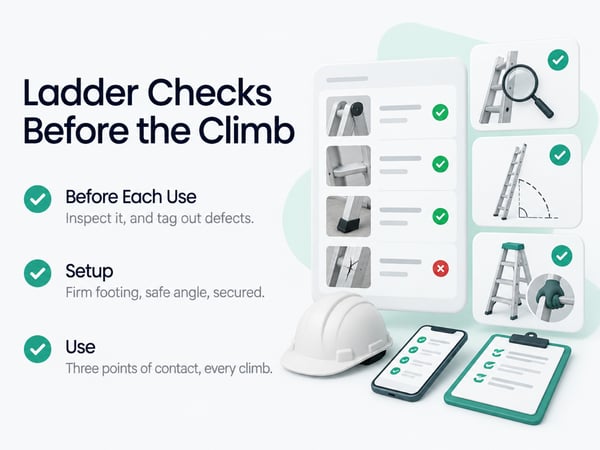
Ladders are everywhere and are involved in a large number of falls. Check them before use.
Before each use
- [ ] Ladder is the right type and length for the task, with a rating for the load
- [ ] Side rails not bent, cracked, or damaged
- [ ] Rungs and steps intact, clean, and free of grease and mud
- [ ] Feet and non-slip pads in good condition
- [ ] Spreaders and locks working on stepladders
- [ ] No missing or illegible labels
- [ ] No paint or coatings hiding cracks
- [ ] Defective ladders tagged and removed from service. Photo
Setup
- [ ] On firm, level footing, not on boxes or loose material
- [ ] Extension ladder at a safe angle. A common guide is about one foot out for every four feet of height, but confirm against your safety program
- [ ] Top extends at least three feet above the landing when used for access to a roof or platform
- [ ] Secured at the top and bottom where required
- [ ] Not set in front of doors that can open into it unless blocked or guarded
- [ ] Away from overhead power lines
- [ ] Stepladders fully open and locked, and not used in the closed position
- [ ] Workers do not stand on the top step or top cap
Use
- [ ] Three points of contact when climbing
- [ ] Facing the ladder, with tools carried in a belt or hoisted
- [ ] No leaning or overreaching, and the belt buckle stays between the rails
- [ ] Only one person on the ladder unless designed for two
Template 4: Fall Protection
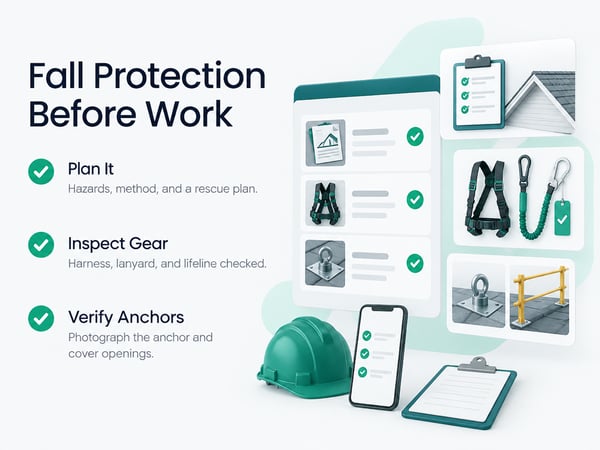
Fall protection requirements depend on the work type and height. In general construction, a fall protection threshold of six feet commonly applies, with other rules for specific work such as scaffolds and steel erection. Confirm the applicable standards for your work.
Planning
- [ ] Written fall protection plan or job hazard analysis for the task
- [ ] Hazards identified: edges, openings, skylights, roof slopes, ladders, and leading edges
- [ ] Method selected: guardrails, safety nets, personal fall arrest, or other approved systems
- [ ] Rescue plan for a worker who has fallen and is suspended
- [ ] Competent person identified
Equipment
- [ ] Harnesses inspected: webbing, stitching, buckles, and D-rings. Photo of any defect
- [ ] Lanyards and self-retracting lifelines inspected and tagged
- [ ] Equipment rated for the worker's weight and the application
- [ ] Defective equipment removed from service
- [ ] Equipment not previously involved in a fall
Anchorage and systems
- [ ] Anchor points identified and rated for the required load, and installed per instructions. Photo
- [ ] Guardrails in place, with correct height, top rail, midrail, and toeboards where required
- [ ] Floor and roof openings covered, secured, and marked. Photo
- [ ] Roof edge protection or warning lines in place where applicable
- [ ] Ladder access to roofs secured and extending above the landing
Training and behavior
- [ ] Workers trained on equipment and hazards, with records
- [ ] Workers observed wearing and connecting equipment correctly
- [ ] No unprotected work at edges or openings
If anything fails, stop work at that location, photograph the condition, correct it, and re-check before work resumes.
Template 5: Scaffold and Lift Inspection
Scaffolds must be erected and inspected by qualified people. A competent person inspects before each shift under OSHA rules.
- [ ] Erected under the supervision of a competent person
- [ ] Base plates, mud sills, and footings stable and level
- [ ] Frames plumb, braced, and properly pinned
- [ ] Platforms fully planked, with no gaps and with proper overlap
- [ ] Guardrails, midrails, and toeboards in place
- [ ] Safe access, such as a ladder or stair tower, provided
- [ ] Ties to the structure in place per the manufacturer's instructions
- [ ] Load limits posted and respected
- [ ] Overhead protection where needed
- [ ] Clearance from power lines
- [ ] Tag showing daily inspection by a competent person. Photo
For aerial lifts and scissor lifts:
- [ ] Operators trained and authorized
- [ ] Pre-use inspection completed
- [ ] Fall protection used where required by the manufacturer and rules
- [ ] Ground conditions stable and free of holes and slopes
- [ ] Power line clearances observed
- [ ] Controls, brakes, and emergency lowering tested
Template 6: Excavation and Trench
Excavations require daily inspection by a competent person, and protective systems are required at specified depths. Confirm the rules for your jurisdiction.
- [ ] Underground utilities located and marked before digging
- [ ] Competent person inspects the excavation daily and after rain or other changes
- [ ] Protective system in place where required: sloping, shoring, or trench box. Photo
- [ ] Soil classification documented
- [ ] Spoil piles and equipment kept back from the edge
- [ ] Safe means of egress within required distance of workers, such as a ladder or ramp
- [ ] Water accumulation controlled and monitored
- [ ] Atmosphere tested where hazardous conditions are possible
- [ ] Barricades, signs, and fencing around open excavations
- [ ] Workers do not enter an unprotected excavation
- [ ] Emergency response and rescue plan in place
Template 7: Electrical and Lockout
Electrical hazards cause serious injuries even at common voltages. Check temporary power and energy control.
- [ ] GFCI protection on temporary power and outdoor outlets
- [ ] Cords and tools undamaged, with grounding intact
- [ ] Cords not run through water, doorways, or traffic without protection
- [ ] Panels labeled, covered, and accessible
- [ ] No working on energized equipment without proper procedures
- [ ] Lockout and tagout in place when servicing equipment, with each worker applying their own lock
- [ ] Overhead power lines identified, with safe clearance for equipment, ladders, and materials
- [ ] Workers aware of arc flash hazards where relevant, and trained accordingly
Incident and Near-Miss Reporting
Near misses are free warnings. Make reporting easy and free of blame.
Copy-ready near-miss or incident report
Date and time: [__] | Location: [Area, with GPS stamp] | Reported by: [Name]
What happened: [Facts only]
Who was involved or nearby: [Names]
Injury or damage: [None / description]
Immediate action taken: [Treatment, area secured, work stopped]
Photos: [Attached]
Contributing factors: [Conditions, equipment, procedure, weather]
Corrective action and owner: [Action, person, due date]
Follow-up verified by: [Name, date]
Reporting of serious injuries and fatalities to OSHA has deadlines, and recordkeeping obligations may apply to your company. Confirm your obligations with a safety professional or OSHA directly.
Turning Failed Items Into Closed Items
A failed item that is only noted is a hazard that is still there.
- Photograph the hazard with a label and scale
- Stop work if it is an imminent danger
- Assign a named person and a due date. Immediate hazards are fixed immediately
- Correct the condition and photograph it from the same angle
- Re-check by the supervisor or competent person
- Close the item in the app with the correction photo attached
- Review trends weekly: repeated failures point to training or planning problems
Safety work takes labor. Track time on safety inspections and corrections under its own cost code, so the cost shows up in your job cost reports and bids. See time tracking for construction workers and construction time tracking software.
What to Look for in a Safety Checklist App
Use the same criteria as for any field documentation app, with a few safety-specific needs.
Must-have
- Custom checklist templates that you can edit
- Pass, fail, and N/A with a required photo on a fail
- Automatic timestamp and location on every entry
- Offline capture, since many hazards live where signal does not
- Assignments and due dates for corrective actions
- Re-check workflow with before and after photos
- Toolbox talk sign-in by app, with attendance reports
- Reports that export cleanly for owners, insurers, and inspectors
- Role-based access so subs see their items
Strong value
- Trend reports: failures by type, location, and trade
- Links between safety records and crew time records
- Incident and near-miss forms
- Equipment inspection tracking
- Training and certification expiration tracking
For platform comparisons covering time tracking and field documentation, see top 5 time tracking apps, top 5 BusyBusy alternatives, and TaskTag vs. BusyBusy. Outdoor and landscape crews, who face heat, equipment, and trenching hazards, can find tracking patterns in time tracking for landscapers.
Subcontractor Safety
On shared sites, safety is shared. Put expectations in writing and enforce them.
- Require subs to follow your site safety plan and their own program
- Collect insurance, safety records, and required training certifications before work starts
- Include subs in toolbox talks and daily walks
- Require subs to report incidents and near misses the same day
- Document unsafe conditions and repeated violations
- Reserve the right to stop work and remove workers for serious violations
See how to negotiate a construction contract for safety and compliance clauses, and how to fire a subcontractor for documenting repeated failures. Safety problems also cause schedule loss, so track stop-work time as a delay. See construction project delay.
Rollout Plan for a Crew
Start small and build the habit.
Week 1: Build
- [ ] Load the toolbox talk, daily walk, ladder, and fall protection templates
- [ ] Edit them to match your safety program and your common work
- [ ] Name the competent persons for each inspection that requires one
Week 2: Train
- [ ] Walk each foreman through a real checklist on site
- [ ] Practice photographing a hazard and assigning a correction
- [ ] Confirm offline mode works in your worst-signal area
Week 3: Run
- [ ] Complete the toolbox talk and daily walk every day
- [ ] Review failures at the end of each day
- [ ] Hold a short weekly review of trends and open items
Ongoing
- [ ] Add templates for scaffolds, excavations, and electrical as needed
- [ ] Review near misses monthly and adjust training
- [ ] Update templates after every incident or rule change
- [ ] Archive records by project for the required retention period
One-Page Daily Safety Checklist
- [ ] Toolbox talk held, with attendance recorded
- [ ] Daily site walk completed, and failures photographed
- [ ] Ladders inspected before use
- [ ] Fall protection planned, equipment inspected, and anchors verified
- [ ] Scaffolds and lifts inspected by a competent person
- [ ] Excavations inspected by a competent person
- [ ] Temporary power protected by GFCIs
- [ ] PPE in use
- [ ] Hazards corrected or work stopped
- [ ] Near misses and incidents reported
- [ ] Open items reviewed at end of day
Related Resources
Inspection Workflow and Role Guide:
- Field Inspection Workflow: checklists, photos, and reports in one workflow
- Roofing Project Manager Role Guide: daily operations for roofing crews
TaskTag Features:
- GPS Time Tracking for Construction: verified crew presence by project
- Construction Time Tracking Software: platform overview
- Time Tracking for Construction Workers: crew clock-in guide
- Top 5 Time Tracking Apps: platform comparison
- Top 5 BusyBusy Alternatives: alternatives guide
- TaskTag vs. BusyBusy: feature comparison
- Time Tracking for Landscapers: tracking for outdoor crews
Related Blog Posts:
- Construction Defect Claims: documentation in disputes
- Construction Project Delay: stop-work time and schedule impact
- How to Negotiate a Construction Contract: safety and compliance clauses
- How to Fire a Subcontractor: documenting repeated violations
- Construction Project Closeout: closeout records
- Contractor Profit and Loss Statement: safety cost in financials
- Construction Bonds Guide: why safety records can affect bonding